Make it Monday-Rustic Blanket Ladder
Yesterday was chilly for April here in my neck of the woods. But it was sunny and pretty, and I didn't want to be cooped up in the house! I'd been racking my brain for the past week trying to figure out a storage solution for blankets that we use in the living room. So, Saturday while I was helping Tim wax his car, I noticed that we had a few extra pieces of wood leftover from the wall we built between the kitchen and living room. I'd seen a few blanket ladders on Pinterest, but they weren't exactly what I was looking for. Thus, my project was born. It's perfect for small spaces!
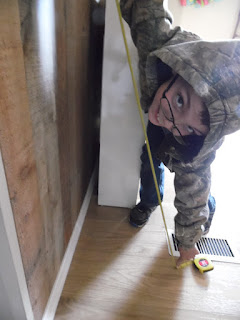
My tiny area, and adorable help
|

 Of course, I can't work without coffee, so I grabbed a cup, which was a good excuse for a leggings selfie too! I used 2X3's because that's what I had on hand, but you could use
 any size you have. I do like the rungs being the 2x3's though, because the blankets hang on them well. I set up a workspace in hub's garage, since it was pretty warm with the sun shining in and got to work. I cut the bottoms of the longer pieces on a slight (10 degree) angle.
It brought the piece out from the wall just enough that it would give the blankets room to hang down in the back, but still clear the vent in front. Of course, your angle may vary. I cut the tops straight across. Tim had to hold up the pieces and after a few minutes, I let him do a bit of the work so I could snap photos.
After getting everything cut to the sizes I needed, I measured where I wanted the rungs to go. I marked out a spot at 8", 16", 24", and 32". Tim showed me how to use his square blade to mark out the centers of the pieces, then shook his head and laughed when I was completely bumfuzzled and I just let him go at it, since that's his bread and butter, being a fabricator
Once the spots were marked, I went ahead and pre-drilled the holes to minimize splitting.
I used 2 1/2" wood screws to hold everything together. We put all the rungs onto one side, then Tim again used the square blade to twist them to a 45 degree angle before screwing the other side into place.
Once everything was put together, I used a bit of wood filler to fill in over the holes where the screws went. I sanded the whole thing with a 220 grit sanding block just to take off any excessive roughness. Then I hit a wall. It was made of pine, and looked way too neat and new to blend with the rustic style we have in our living room and kitchen. What can I say? I like my stuff to look like I just pulled it out of a barn after 100 years. I contemplated painting it white, but I didn't think it would look right with the off-white color our fireplace work-in-progress is. Then I was going to stain it with the leftover hickory stain from the kitchen floors last week. Nope. Tim tossed what was left. Then I remembered a trick I had used quite a long time ago. Old English. Yep, the scratch remover stuff. I grabbed a bottle of dark that I had under the sink, an old sock, and rubbed it in well. Perfection! See the pic for a good idea of what it looks like before and after.
I let that soak in and dry for a couple of hours while we went and ran a few errands. By the time we got back home it was beautiful, but it still needed a little something. I had a quart of Polycrylic that I use to refinish my island top once a year, so I went ahead and put a good thick coat on the whole thing. Polycrylic tends to give a slightly yellow tint on lighter wood, so any areas where the Old English was slightly lighter turned a gorgeous golden color. I let it dry for several hours, and it was ready to bring inside.
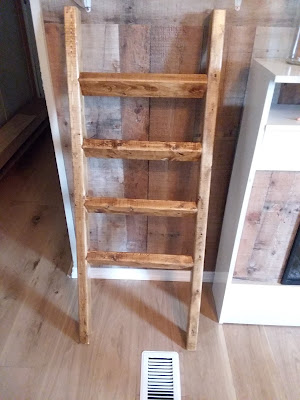
I'm pleased as punch with the final product! I hung several different blankets on it to test, and it holds them up beautifully. If I were to do anything different, I would have twisted the rungs in the other direction so that they were angled up instead of down, but honestly it makes no difference on how well it holds them up. I found the basket underneath on clearance at Walmart for $3 and it's perfect for smaller blankets and throw pillows too. Glad I decided to brave the chill and get this finished, it works so perfectly in here!


Comments
Post a Comment
Remember to keep all comments respectful! Thanks!